Building a pedalboard is not rocket science. If you want something all boutique and stuff with fancy case and all that, you won't find it here. I cut my pedalboards out of scrap wood and transport them in suitcases I buy for a buck at the thrift store. I have several of varying sizes that I use depending on my needs. The smallest one I take to one night jams and the like, it holds three pedals, the largest board holds 7-8. They are so easy and cheap it makes sense to have more than one to suit whatever need you have.

What is needed:
  • The board itself.
  • Some way to hold the pedals to the board.
  • Connect the pedals.
  • Power to the pedals.
  • Get the signal from the board to your rig.
  • Do all this as easily as possible so you can go pick up chicks 'n stuff.

Guitarman of the Board:
        For the board, plywood. You can use up to 1/2 inch, more than that is unnecessary. My smallest pedalboard is made from scrap 1/4" plywood. The larger ones are either 3/8" or 1/2". One thing I noticed is that plywood can be stronger in one direction than in the other. To check it take the wood and try to bend it, whichever way is least easy to bend is the one you want for the longer dimension. Decide how many pedals you want to mount and cut it accordingly. If you have more than more than 4 or 5 pedals the two tiered approach described below is a good idea. 

Sticky situation:
        I use Velcro to hold the pedals to the board. Don't use the little strips, get a three or four inch roll that will cover the whole bottom of the pedal. Veltex fabric is used to cover the board. Do a Google search for "Veltex fabric" to find it. It is specifically designed for Velcro. You should be able to get a square yard of Veltex and a roll of wide Velcro for around $25, that should be enough for several boards.
        After you cut your board to size, cut the Veltex to match. Spray the board with spray adhesive, and carefully attach the Veltex to it. Be careful not to get any on the fabric. Attach some rubber feet to the bottom of the board, either stick on or screw on. You can get them at Radio Shack or hardware stores. Bam, yer done.

Let's hook up, dude:
        I make my own short connector cables when I need a special length, and use short commercial ones for the rest. There are all kinds of things like that on the market now and if you are a George L's kind of guy, go for it, I'm not gonna get into that debate here. There are also double male 1/4" adapters made by Switchcraft and others that have no cable at all, those are cool too.

Power to the Pedals:
        Batteries? The drawbacks are that with modern pedals like digital delays, chorus pedals, Univibes, and tuners like the Strobostomp use a huge amount of current. A nine volt battery won't last the night in one of those. A battery alternative I've done is put together a battery pack with "C" cell holders adding up 9 volts and mounted in on my pedalboard. A pack like that will last quite a while, but of course it takes up a good bit of space, and you have to remember to switch it off.
        The best thing to do is use a regulated power supply. I have a Boss PSA120 I've had for years but it's only a 200ma supply, so I can't use it for my main pedalboard anymore because it doesn't supply enough current for all the pedals I use. I used a One Spot for a couple of years but it developed a bad hum and I trashed it.
        I've built regulated power supplies in the past and still have a few, that's what I use now. They are quite easy, just a transformer and a few parts. It's built with a 7809 regulator that will power up to about 1 amps worth of pedals. There is also a 78S09 regulator that will deliver up to 2 amps, that should supply enough current to run anything you throw at it.  Mouser has all the parts you need. I've posted a few different schematics below, including the one I use.
        People talk about getting hum from a single supply powering several pedals but I've never had a problem with it. If you do then you could build a supply where each pedal has it's own dedicated supply with it's own transformer. R. G. Keen's Spyder is one such, go to his website to see it. Ted Weber sells a transformer that has 8 secondaries that would make it easy. If you do that though you won't be able to use my pedalsnake idea, because the supply will have to be mounted on your board, and you're back to running AC extension cords.
        

If you do build your own power supply be aware that you are working with 125 volts AC!!
YOU MUST KNOW WHAT YOU ARE DOING OR DEATH WILL RESULT!!!
JUST BUY A COMMERCIAL ONE IF YOU ARE UNSURE HOW TO BUILD ONE!! 
DIY Pedalboards, Power Supplies, and Pedal Snakes
Make it easy, build a snake:
        I see a lot of guys with pedalboards that have bulky power supplies mounted on them, and AC extension cords running along side their guitar cables to power them. All that cable is a pain in the ass, and the AC contributes to hum and noise. If you keep your power supplies back at your amp and run it in the same cable along with your guitar signal you'll eliminate all that.
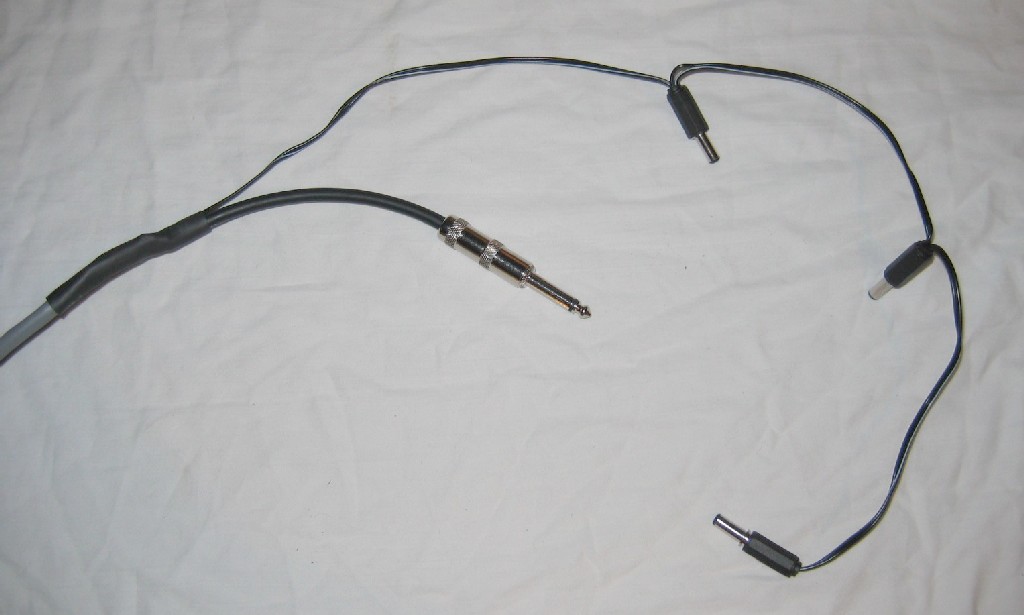
        I used a cable I bought on the surplus market that has three separate shielded pair of wires, each foil wrapped with a drain/ground wire. This enables me to have a guitar send, a DC line, and either a second send for a stereo rig or a return that could be used for a wireless rig. This would enable you to have a wireless rig and still have a pedalboard down in front. 
        The first pedalsnake I built was for my smaller board, and it worked great. I'll definitely build one for my larger board.
The amp end has a 1/4" connector that goes to the amp input, a female 2.1 DC power jack, and a 2.1 DC plug paralleled with the jack in case I want to power an effect back at the amp. It's an option, you don't need to add it if you don't need it. The board end has a 1/4" plug for the board output, and as many daisy chained 2.1 DC power plugs as you need for your board. There are a lot of options here; You could leave the power jacks on the board and just have a connector to plug the DC from the snake into. That might be a good idea if you have a lot of pedals. You could run separate lines if you have pedals that require different voltages, or an old fuzz that is positive ground. I use a stereo rig so I'll have two returns back to the amp end.
        Be careful when you are soldering it up, and use lots of shrink wrap to keep it sturdy. The pedalsnake I built is about 18 feet long, you can choose your own length of course.  Mouser, Markertek and Parts Express all sell multiconductor and snake cable.
Pedalboard top with Veltex attached
Pedalboard with feet attached
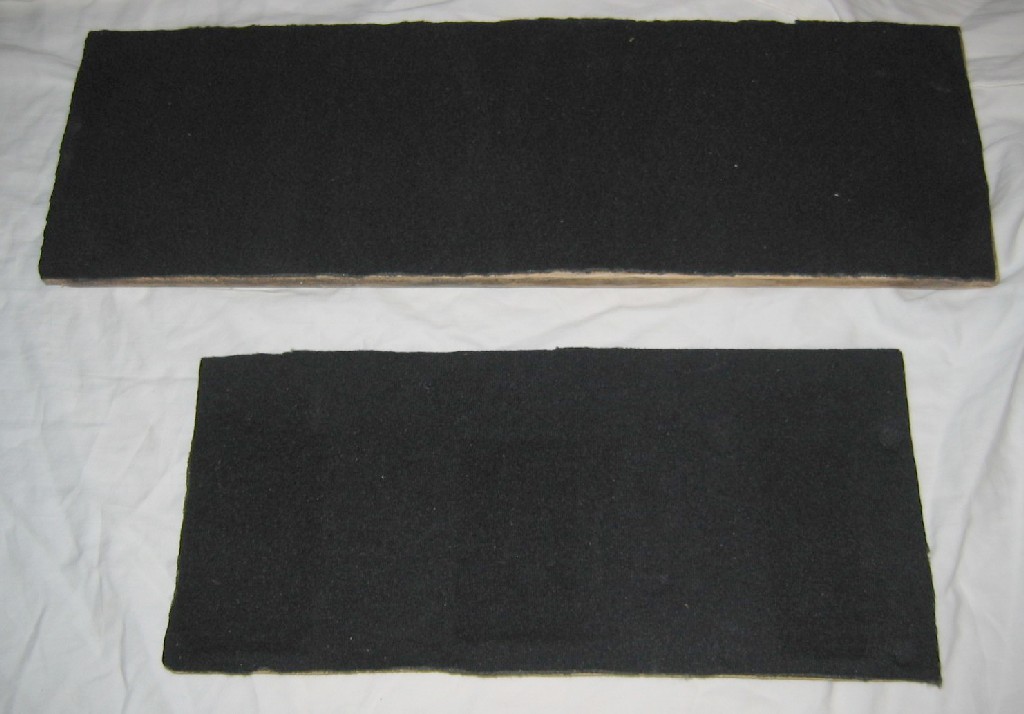
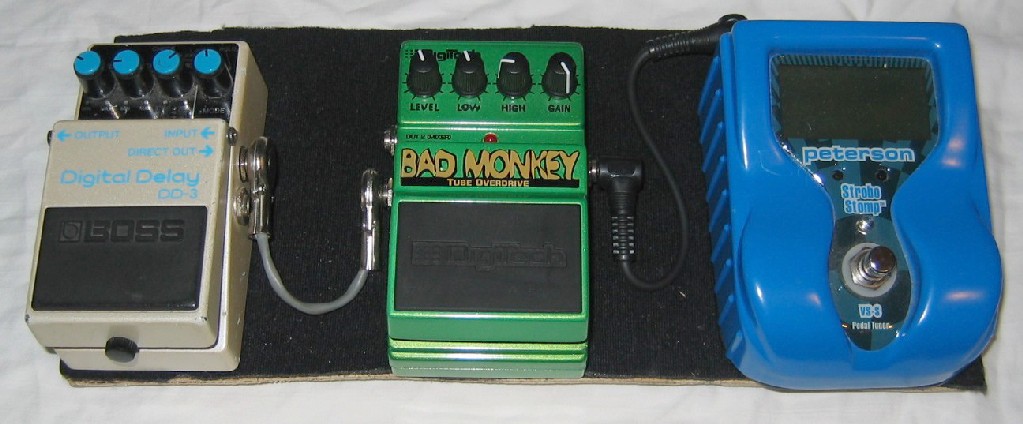
Here are the smaller boards showing the Veltex. The top one holds 4 pedals, the smaller holds 3. They are show below with some sample pedals mounted on them. Easy, light, and portable.
Three pedal board with sample pedals
Four pedal board with sample pedals
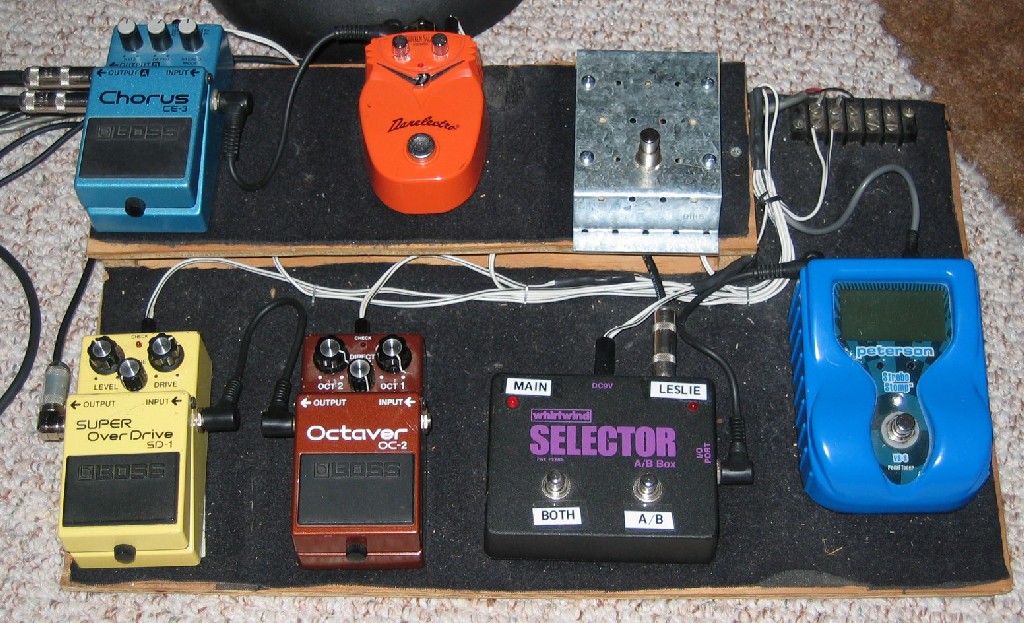
Here is my main two tiered board I've had for many years. I holds 7-8 pedals if I squeeze them in. The second tier is another piece of plywood mounted on 1 inch pieces of pine. I've powered this one with a hard wired cable to a terminal block, then running a hydra of lines to each pedal. After the success of my Pedalsnake you'll see below, I'm going to rewire this one to use one. It will save me a lot of cabling because I use a stereo chorus on this board that uses two separate amp runs and a separate line back to the amps for the 9v supply. 
Big pedalboard with pedals
Here are some shots of my various boards. Click on a pic for a larger view.
Board end of Pedal Snake
Amplifer end of Pedal Snake
Board end
Amp end
My power supply schematic
Links and Schematics
Pedal Snake attached to board and pedals
Here is the snake hooked up to the board
R.G. Keens Spyder power supply
R.G. Keen again, polarity protection ideas
R.G. Keens supply with dying battery option
Power supply details explained
Boss ASA vs PSA supplies explained
More Boss PSA vs ASA info
Stompbox power wiring explained, good page
Ted Webers page
My Pedal Snake schematic
Home
My Tech Page