1965 Silvertone 1482
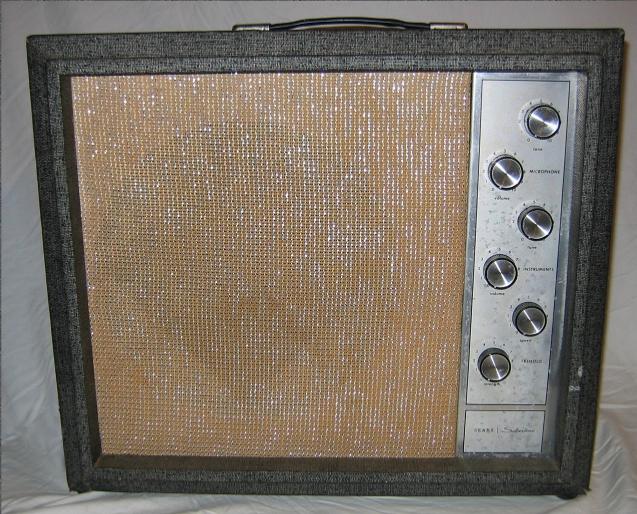
This is my Silvertone 1482, built in 1965. This amp like most of the Sears amps of those days was actually manufactured by Danelectro. It is around a 15 watt amp, so I won't be playing any arenas with it. The very first guitar amplifier I owned back in 1969 was a 1482, along with an Epiphone ET-270 guitar. I paid $70.00 for this amp, non-working. It wasn't a difficult repair; there was a fried 2.2k resistor in the power supply. There was no back included with the amp, and the sale only included power tubes. I installed some 12AX7s from my stash, and fired it up.
Even though a lot of guys rave about these amps, I wasn't impressed with the tone. (Funny, it sure sounded good in 1969!) The amp sounded dull, didn't have a lot of low end and didn't have much breakup.
This amp is marginally similar to a Fender Tweed 5E3 Deluxe. To move it toward a more usable tone, here is the first series of mods I did:
- Replaced all the .01 caps with .1 orange drops.
- Replaced all the other caps with equal value orange drops.
- Replaced all the electrolytics with equal valued new ones.
- Disconnected the tone controls (Not enough high end as it is!!)
- Replaced the input jacks with Switchcraft 12A shorting jacks.
- Did the "Paul C Mod".
- Replaced the crappy OEM Fisher speaker with a Jensen P12PS pulled from an old organ speaker cab.
- Replaced power cord with grounded cable and removed death cap.

Ok, so a few years later, I pulled it out and it still sounded bad. I then did a google search on "Silvertone 1482" looking for mod tips, and what the hell, this page is the first one that popped up!! I figured I better get this thing working if all you guys are checking it out!
The first thing to solve was the noise problem. Just touching the preamp tube was enough to set off a racket, and I realized the tube sockets needed cleaning and re-tensioning. Using a small dental brush and isopropyl alcohol, I scrubbed each pinhole of each tube socket. Then I re-tensioned all the pinholes of all the sockets. I had to do the preamp tube socket twice before it settled down and all the noise was gone. This solved the motorboating problem too. When I reinstalled the 12AX7's, I dug through my junk box and found a couple of spring loaded tube shield covers that fit perfectly. Oh, and I used contact cleaner in all the pots to quiet them down too.
Next, the thing generally still sounded like ass. I hooked it up to my bias checker and found one of the power tubes had gone bad. A new set of EH 6V6's fixed that.
Next stop: Preamp. I had already replaced the hum prone open frame jacks with new Switchcraft switching jacks. Like a lot of amps in those days, the grounds for the input and trem bypass jacks were only the physical connection of the body of the jacks to the chassis. The ground lugs were not wired at all. Not liking that I installed a grounded solder lug near the jacks and ran wires from it to all the jack ground lugs.
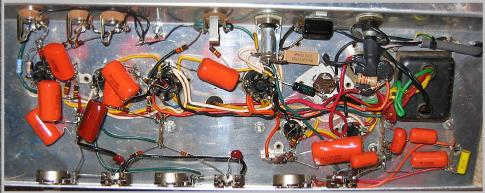
I then rewired the instrument inputs like a Fender Hi/Lo setup with 68k/1meg resistors, and added a .68mf bypass cap to the 2.2k cathode resistor. I re-labeled the inputs Hi and Low.
The microphone input I changed to 33k/1meg resistors, and 1.5k cathode resistor with a 25mf bypass cap. I re-labeled it Tweed, not entirely accurate but that is what the tone reminds me of.
Now, I've got three inputs with different amounts of gain. The instrument inputs are tighter and more defined. The microphone input is looser and thicker.
The final mod to the preamp was to add 120pf bright caps to both volume controls. The tone controls I left disconnected. The amp had more high end now, but not enough to justify the need for high cut tone controls.
Two more mods and I was done with the amp: I added another .68 cathode bypass cap across the 2.2k resistor in the phase inverter, which added another gain boost and a modicum of high end. Usually the PI cathode bypass cap is something like a 25mf cap, but I thought it would get too muddy with that value. Finally I changed one of the .022 caps in the trem circuit to a .047 to slow it down.

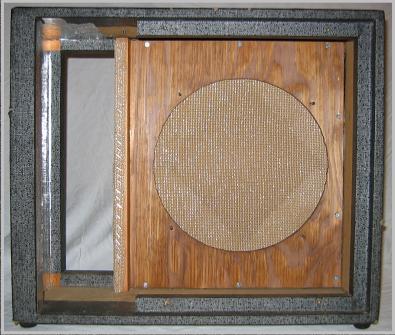
The cabinet. Sigh. Remember, this amp was an economy amp, built to a price point. ($68.95 in 1965, about the same I paid for this one thirty five years later!!) It is not an exaggeration to say the cabinet is built out of cardboard. At any rate it is some kind of pressed board, not resembling wood in any way. A mere 5 inches deep from the rear of the faceplate to the back of the cabinet too, not advantageous to good tone. The back and faceplate were 1/4" masonite, not the sturdiest or most audiophile quality material. In fact, a few years after it's introduction, they cheaped out and instead of a one piece faceplate with a circular hole for the speaker, changed it to a two piece with a very small square hole, I guess to make construction quicker. Instead of using a circle cutter, they did two quick cuts with a circular saw on each half. The resulting hole was much smaller than what the 12 inch speaker required, and contributed to the poor sound of the amp. You can see the difference in the pics below.
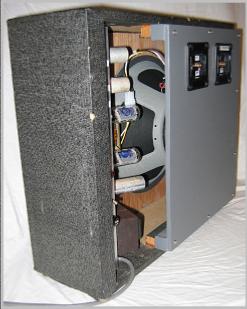
I wanted to install a WSG Veteran speaker I had on the shelf, so a new faceplate was in order. I used 3/8" plywood and cut the speaker hole with my Dremel circle cutter, then transferred the old grillcloth to the new faceplate. It worked great. With the thicker faceplate and new larger speaker the depth was greater than what it was with the original speaker, so I cut a new back and used 1x1's to extend it out from the cabinet to accommodate it.
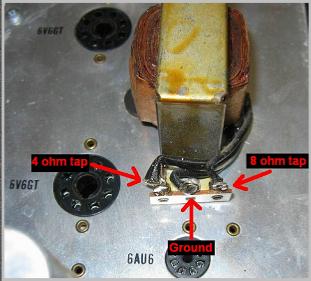
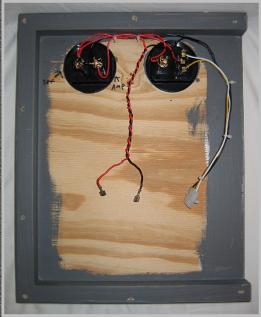
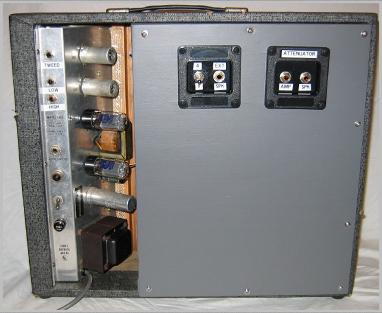
The 1482 has an unused 8 ohm speaker tap which I needed and used for the WSG, and I installed a 4/8 ohm impedance switch and a parallel external speaker jack so I could use the amp with an additional cabinet. See below for info on which tap is which. Finally, I added an attenuator insert like I have on my other amps.
Because the back now has to be removed to pull the chassis, and of course change the speaker, I used Molex connectors to link the wiring on it to the amp.

So, after all the repairs and mods, the amp sounds great! It's much louder, gainier, and while not super bright, the high end has been much improved. While you can get some clean tones, it's pretty much a gain machine, and I like that. It sounds awesome with an overdrive pedal. It's also very quiet, virtually hum and noise free.
The cabinet definitely affects the tone; I have an identical speaker in a separate cabinet and when comparing the two the original cab has a much more midrangey sound, and the separate cab has more low end and depth. Perhaps one day I'll construct a real wood cab, making it deeper, both of which would help the tone. So here is the complete list of mods:
The cabinet definitely affects the tone; I have an identical speaker in a separate cabinet and when comparing the two the original cab has a much more midrangey sound, and the separate cab has more low end and depth. Perhaps one day I'll construct a real wood cab, making it deeper, both of which would help the tone. So here is the complete list of mods:
- Switchcraft 12A shorting input jacks
- Instrument inputs: 1m/68k - 2.2k/.68uf cathode
- Microphone input: 1m/33k - 1.5k/25mf cathode
- .68mf cathode bypass on PI
- Paul C mod
- Grounded AC cord added and death cap removed
- 120pf bright caps on both volume controls
- Replace all electrolytics
- Change all coupling caps to orange drops
- Change .01 caps to .1
- Changed .022 to .047 to slow trem down
- Disconnected tone controls
- Added grounding lug for input and tremolo footswitch jacks
- New tubes
- New 3/8" plywood speaker faceplate
- New extended 3/8" plywood backplate
- Added 4/8 ohm impedance switch
- Attenuator insert
- External parallel speaker jack
- WGS Veteran speaker
- Change the electrolytic caps
- Change to a better speaker
- Add cathode bypass caps
- Change the faceplate if you have that two piece masonite crap
- Replace the AC cord to a grounded one and remove the death cap
Here are some views of the project. Click on the pictures for a larger view.
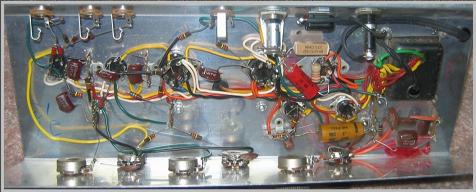
Interior prior to the mods.
Interior after the mods. Note the new input jacks and their grounding lugs, the bright caps on the volume controls, and the new electrolytics.
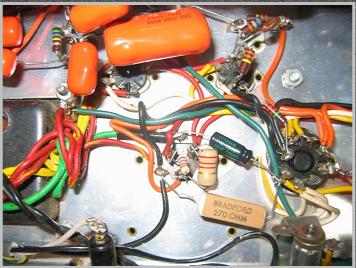
Closeup of the area where the new filter caps will go.
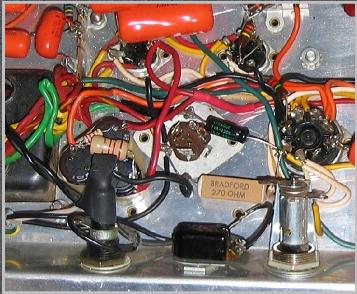
The new filter caps installed. I moved the resistors and used the old filter cap can for a tie point for the ground. I superglued the bottoms of the new caps to secure them, and added some heat shrink to the fuse assembly to insulate it.

Wonder what Sears would say if I called them for parts or service?
Mystery of the OT taps solved.
Interior with the new faceplate installed. I stained it slightly to match the color of the old faceplate. You can still see the outline of the old faceplate on the grillcloth.
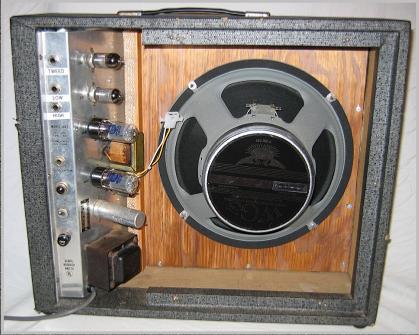
The amp and speaker installed. I used the original speaker mounting studs and nuts. The molex connector will attach to the backplate wiring.

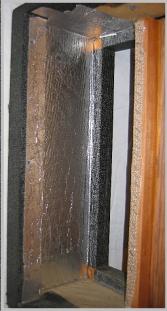
I added some additional shielding using aluminum duct tape on the top and bottom. To ensure an electrical connection to the old foil shielding, I folded the tape over and then stapled it.
The backplate wiring. The Yellow/White/Black wires with the molex connector attach to the OT, and the Black/Red wires attach to the internal speaker.

The new backplate with the impedance switch, external speaker jack, and attenuator insert. Also check out the re-labeled input jacks.
Here you can see the 1x1's I used to extend the backplate.
