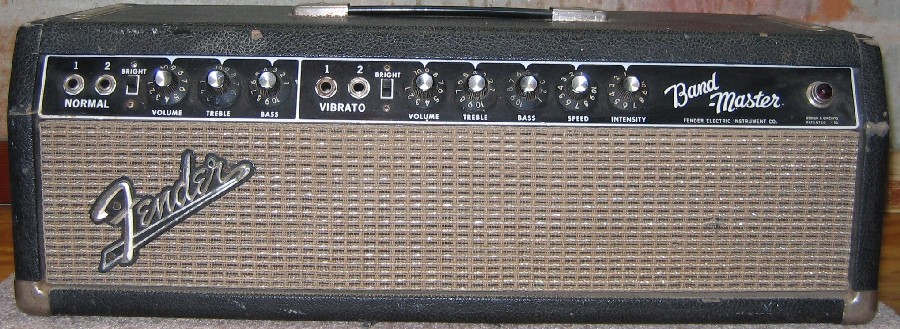
This Bandmaster was bone stock when I got it; check out the picture below. You can sure tell the difference from a pre-CBS amp and one that Leo built. Quality wire and parts, and very neat layout. It had bad power tubes in it and didn't sound very good. It obviously needed a cap job and a tune-up.
The first thing I did was to replace all the electrolytic caps and installed a grounded power cord.
I have modified most of my other Fender amps in one way or another and wanted to keep this one as stock as possible, so I only did a couple of minor mods. I changed the .01 and .02 tremolo caps to all .02 Mallory's, to slow the tremolo down. Also, I replaced the tremolo intensity pot with one that had a switch on it, so I could switch the tremolo circuit in and out of the signal path, providing a very noticeable bump in gain for the amp. (See below for how to do this mod.) Finally, I swapped out the 250pf ceramic caps in the preamp, and the 500pf ceramic in the phase inverter for a silver mica.The bright switch caps I left alone.
As far as tubes go, I'm running a pair of Sovtek 5881's right now, the amp sounds great with them. I used a couple of RCA 7025s and an EH 12AX7 for the preamp.
After all that, the amp sounds great!!! Utterly terrific classic Fender tone with superb cleans, and great overdrive when cranked with a Tube Screamer.
I sold this amp to my good friend Geoff, but am going to leave this page up for the mods and because it's such a cool amp.
Mods and fixes:
- Replaced all electrolytic caps.
- Changed ceramic tremolo caps to all .02 Mallory's.
- Bypass switch for Tremolo
- Changed 250pf ceramic preamp caps to silver micas.
- Installed grounded power cord
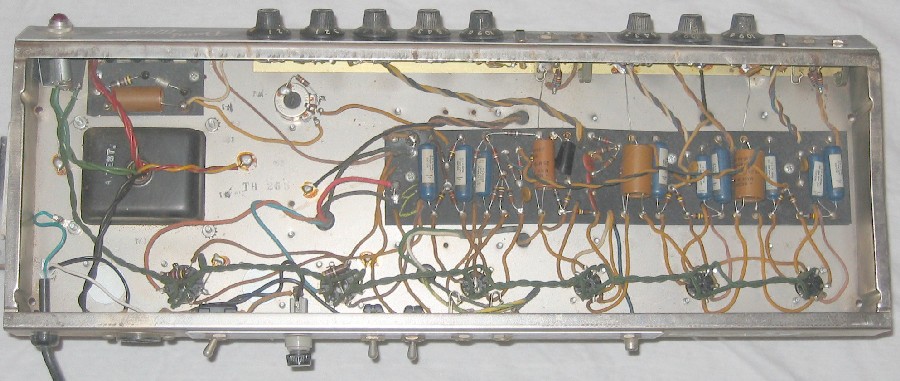
As stock as you can get!!! Superb pre-CBS layout!! Check out those paper electrolytics!!
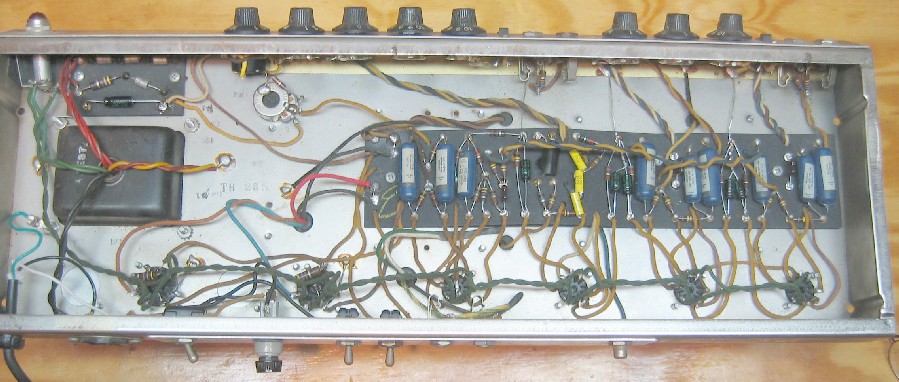
After the tuneup and mods. You can see the electrolytics, silver micas, Mallory's, and the new intensity pot. NO other changes!
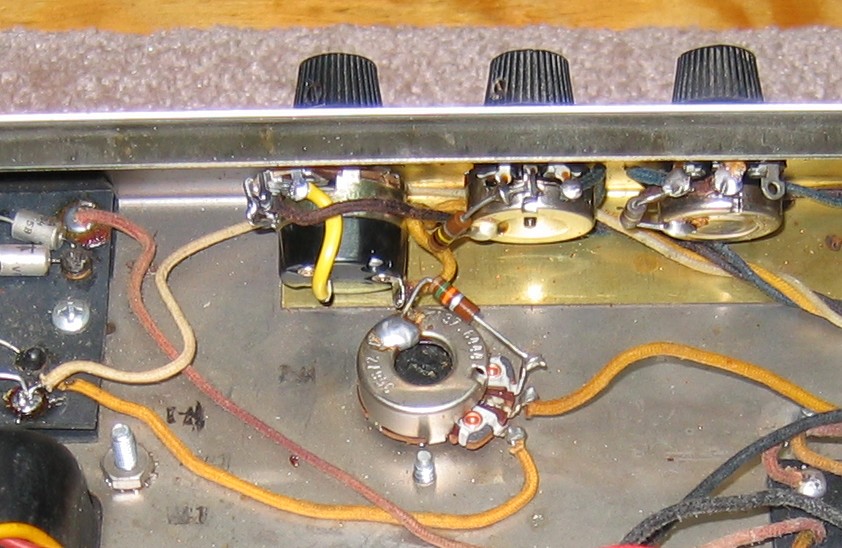
Closeup of the new tremolo intensity pot. It's a simple matter of changing a few wires. Here's how it's done:
1. Disconnect the wires from the 50k RA Intensity pot.
2. Remove the pot.
3. Install new 50k RA Intensity pot with SPST switch attached.
4. Solder Brown wire to center lug as before.
5. Solder left lug to pot casing as before.
6. Solder Yellow wire to one side of switch.
7. Solder short length of new wire from other side of switch to right lug.
I turned the pot to the left a little because it was mighty close to the chassis overhang. That's the bias pot in the foreground.